Self-service integration onboarding (SSIO)
The self-service integration onboarding flow allows merchants to activate integrations of their venues via UI provided by Wolt. This solution designed to activate one venue at time. However, your implementation could support both SSIO and WIO to cover both for self-service and bulk use-cases, if needed.
Checklist
Prerequisites: you are familiar with OAuth flow and your system supports OAuth flows.
Build the link in your system where Merchant can initiate the integration of their venues with Wolt.
Create a callback page in your system where merchants will be redirected to after onboarding. The redirect will include an authorization code as parameter in the URL.
Ensure your system is able to use the authorization code to obtain access and refresh tokens for each venue.
Implement token refresh logic for expired tokens.
Confirm that you know how to extract the Wolt venue ID from the access token, necessary for certain API calls.
Required information from integration partners
If you already support Wolt-led integration onboarding, no additional information is needed. Otherwise, you need to provide the following details to Wolt:
Name: The name of your service.
Redirect URLs: The URLs you can use for redirecting merchants back to your portal after they complete integration on Wolt. If you want to be able to redirect merchants to multiple different URLs, each must be explicitly specified. Wildcards are not supported.
Order webhook URL: The URL where Wolt sends order status updates.
Order webhook client secret: A secret key for verifying that order updates are sent from Wolt.
Order events which trigger notifications: A list of events for which you want to receive notifications for. Supported events include `
CREATED`, `PRODUCTION`, `READY`, `DELIVERED`, and `CANCELED`.Emails and phone numbers: Contact information for test accounts provided by Wolt, which you can use to test the integration.
All URLs must be encrypted with TLS (https) and have a valid certificate.
What Wolt provides you
OAuth2 client credentials: Includes `
client_id` and `client_secret` for authentication. If you already support self-service integration onboarding, you may use existing credentials.Wolt accounts and test venue access: Access to Wolt accounts and test venues for building and testing the integration onboarding flow.
Postman collection that provides an overview of available endpoints to assist with development and testing.
Self-service integration onboarding flow
Self-service integration onboarding consists of multiple steps that happen between the merchant, your system, and Wolt. The following diagram illustrates the flow of the integration onboarding process.

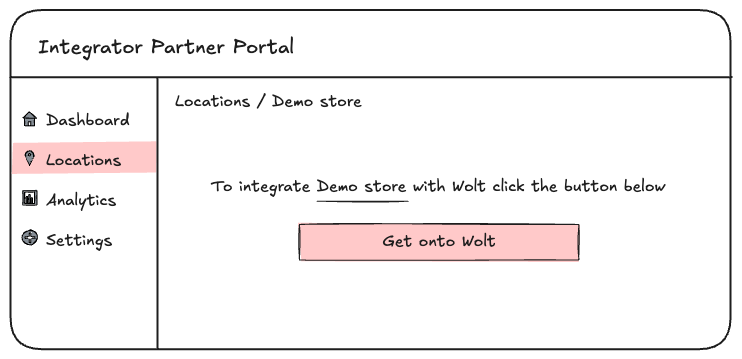
1. Merchant starts the flow on the partner portal

The merchant (user) initiates the onboarding flow at your portal by clicking a call-to-action, e.g. “Activate on Wolt” button, with the
URL source built according to the requirements.
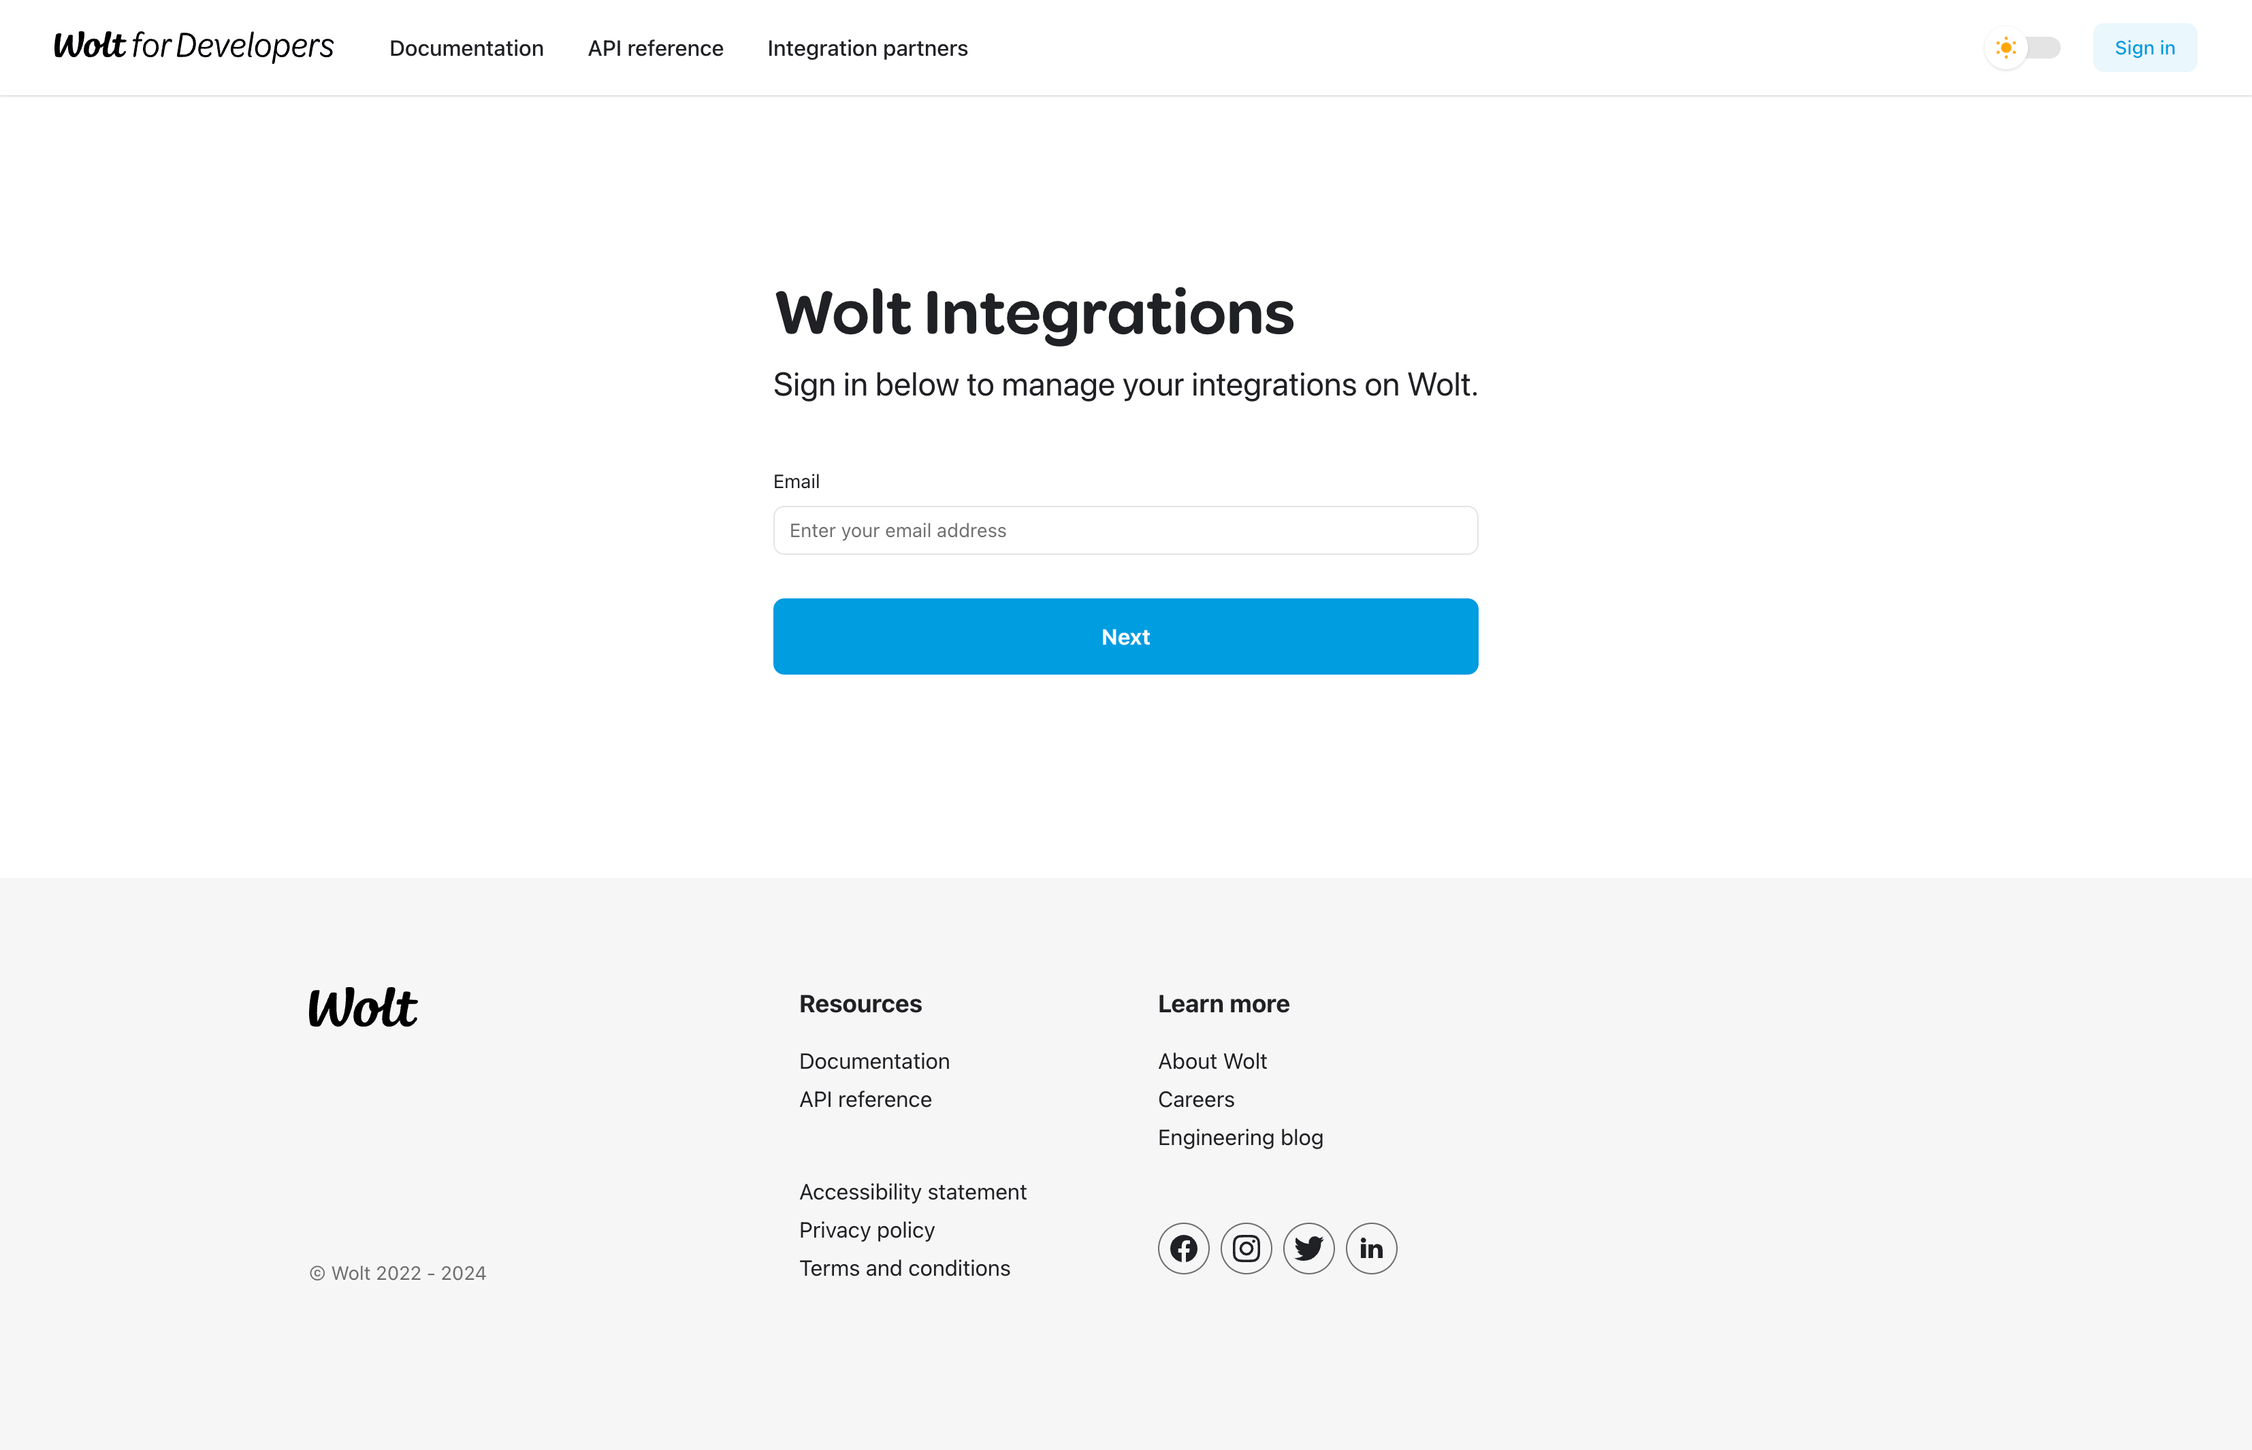
2. Merchant is redirected to Wolt for Developers portal

Your source redirects the user to the Wolt for Developers portal. There the merchant signs-in using their Wolt account. This allows Wolt to identify the merchant and display their venues available for integration.
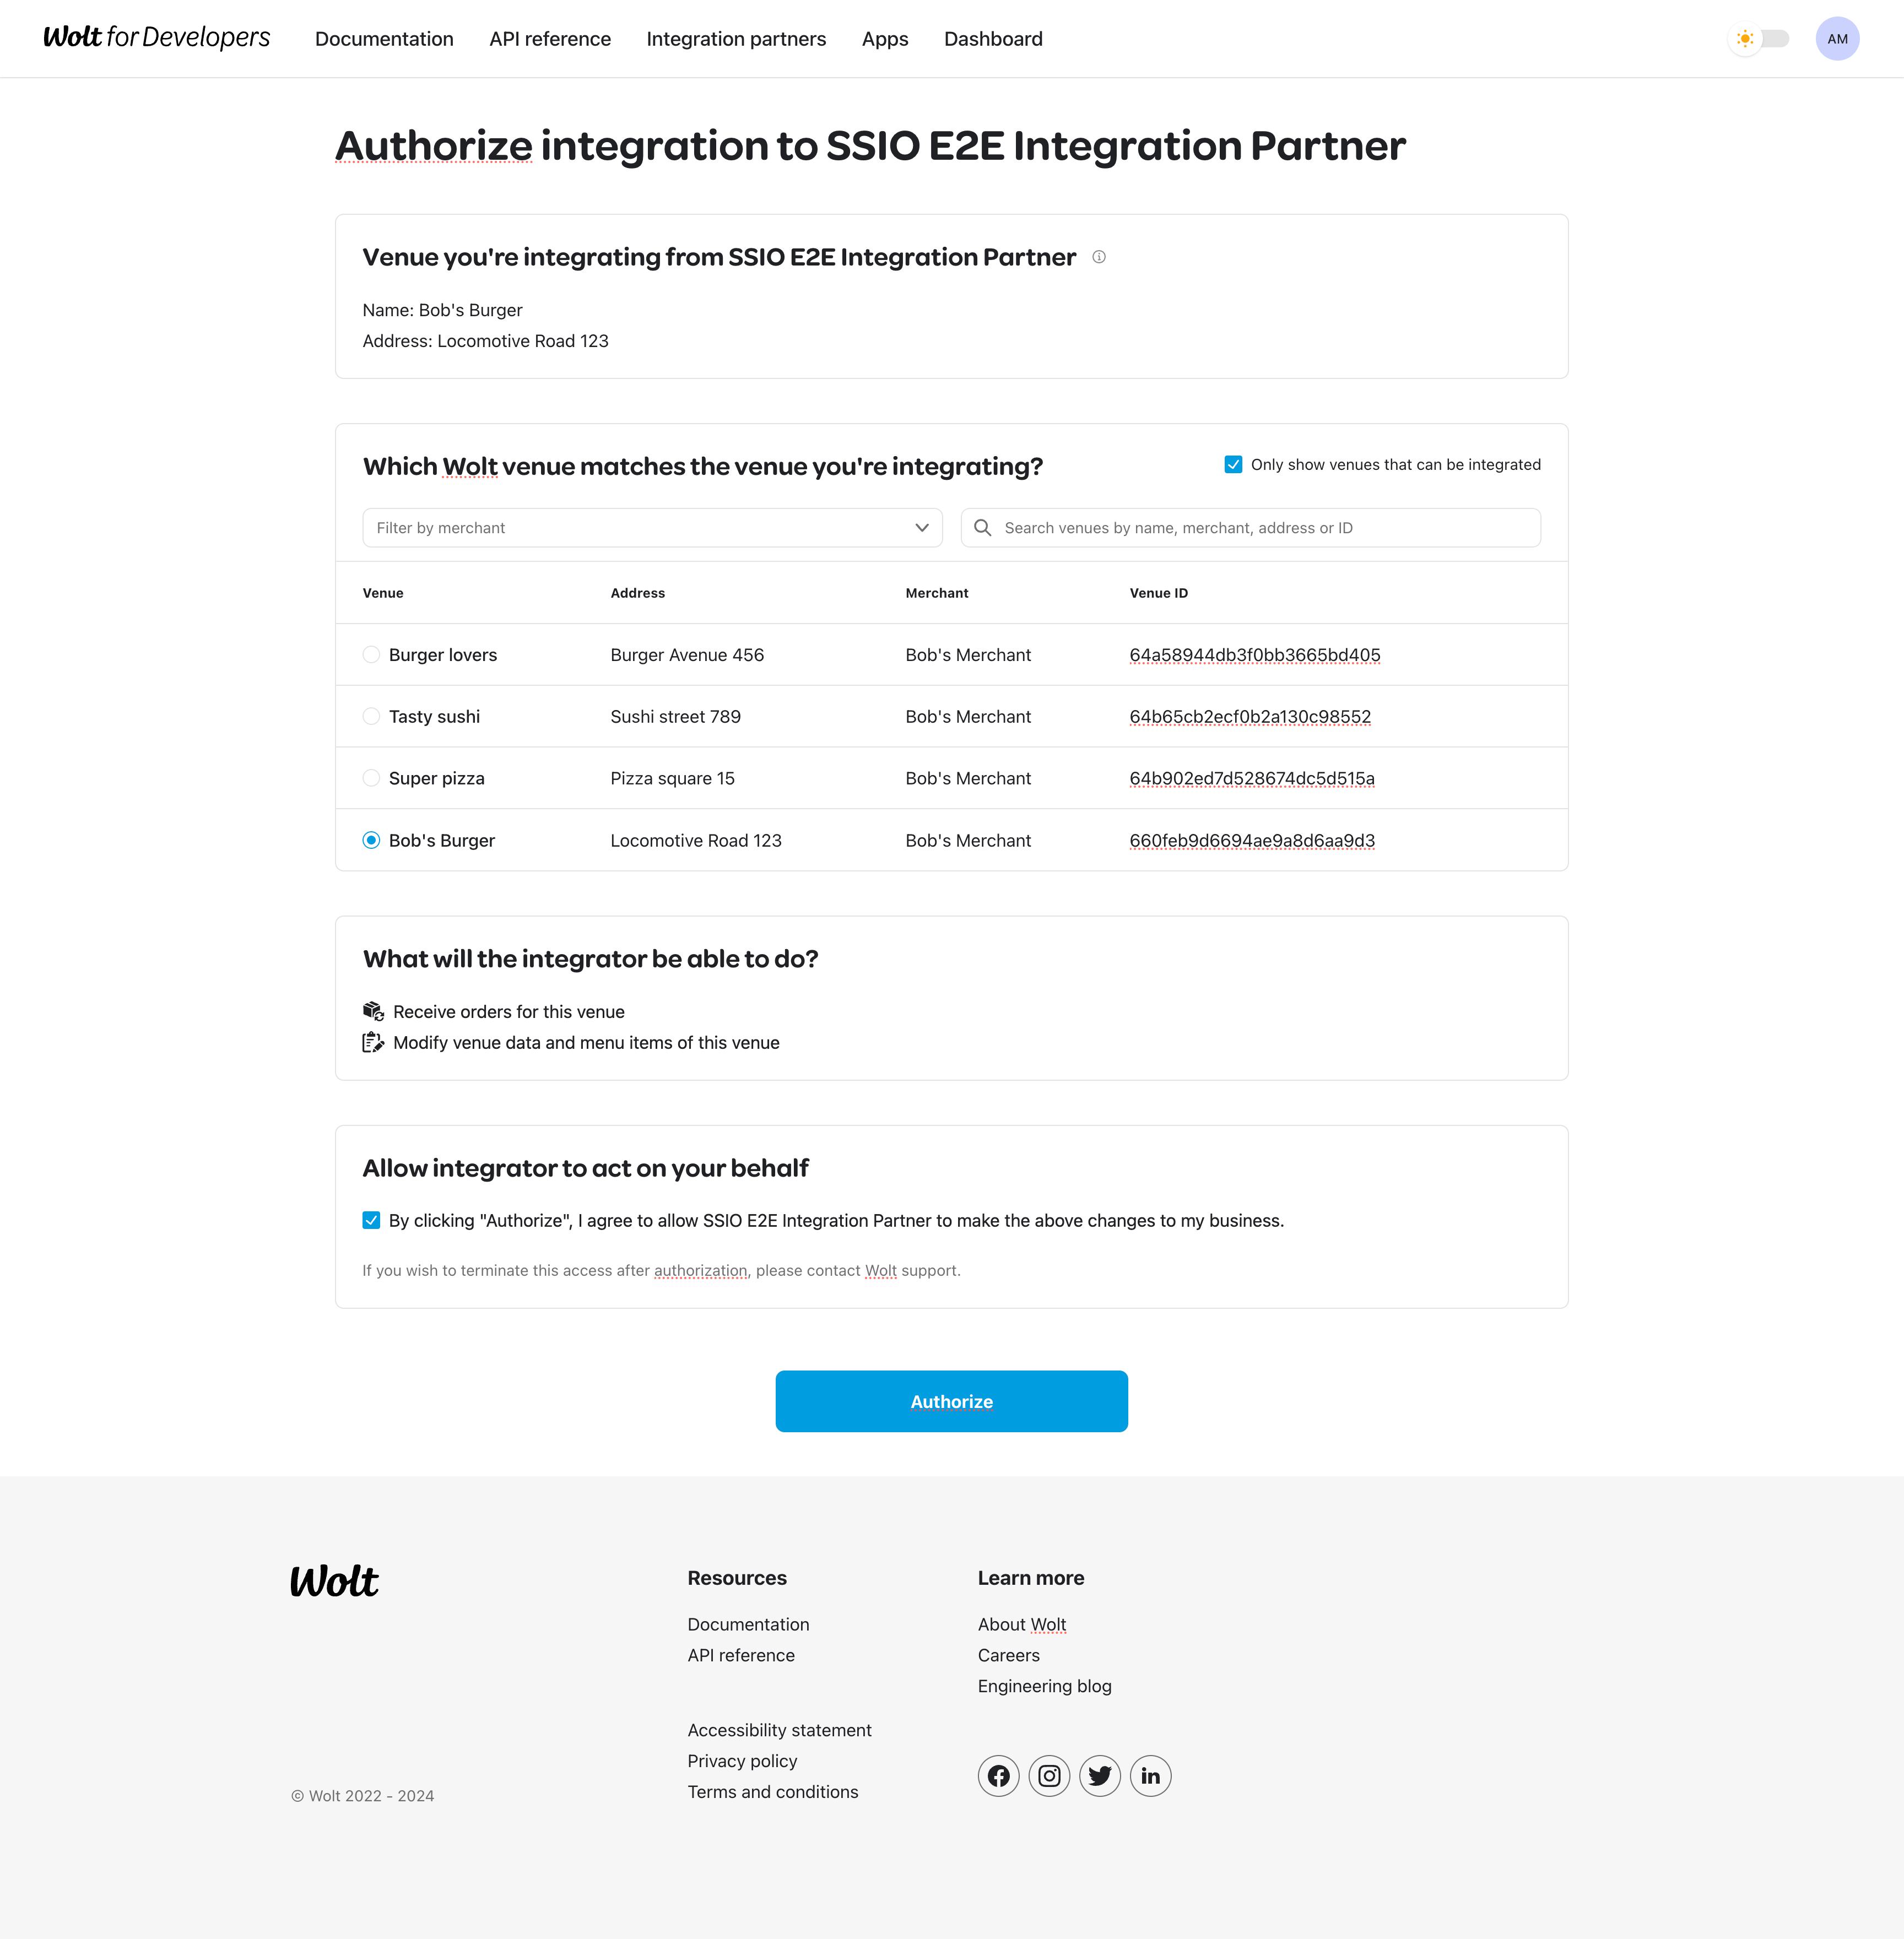
3. Merchant selects a venue and authorizes the integration partner

After viewing the list of their venues available for integration, the merchant selects the venue that matches the one they initiated the integration for. They then grant permission for your system to access and manage the venue using Wolt’s APIs.
4. Merchant is taken back to the partner portal with authorization code
Once the merchant grants authorization, Wolt generates an authorization code and redirects the merchant back to your portal with the code included in the URL.
5. Partner system exchanges the authorization code for tokens
Your system extracts the authorization code from the redirect URL and sends it to Wolt’s authentication service to obtain both an access token and a refresh token. The access token enables communication with Wolt’s APIs, while the refresh token is used to request a new access token once the current one expires. Typically, the authorization code is used only during the initial exchange, after which you should rely solely on the refresh token.
To implement the self-service led integration onboarding flow, you need to implement specific components listed below.
How to?
Build the call-to-action link on your portal
For a merchant to start the integration onboarding process with Wolt, you need to include a call to action (e.g., a button or link) on your portal for each venue that hasn’t been integrated with Wolt. When the merchant triggers this call to action, they should be redirected to the Wolt for Developers portal via a URL that you construct according to specific guidelines.
For example, using the values from the table below, the URL to start the integration onboarding could look like this:
https://developer.development.dev.woltapi.com/integrate?client_id=38dc735a-09a9-4cb3-903c-6e4ffd9f6076&venue_name=Bob's+Burger&venue_address=Locomotive+Road+12&redirect_url=https://www.partner-site.com/callback&state=e5f9cdc78f39d99e
To construct the redirect URL correctly, follow the specifications outlined below.
Base URL
| Environment | Base URL |
|---|---|
| Development | https://developer.development.dev.woltapi.com/integrate |
| Production | https://developer.wolt.com/integrate |
Request parameters
| Parameter name | Type | Description |
|---|---|---|
client_id | Required | Unique identifier for the integration partner.Wolt provides this to you as part of the resources to build the integration onboarding flow.Example: 38dc735a-09a9-4cb3-903c-6e4ffd9f6076 |
redirect_url | Required | The URL to which Wolt will redirect the merchant after completing the integration onboarding flow.Must be one of the redirect URLs you have provided to Wolt.Example: https://www.partner-site.com/callback |
state | Required | An opaque value used to maintain state between the request and the resulting redirect after the integration is completed. The state is appended to the redirect URL when taking the merchant back to the partner portal. This parameter helps prevent cross-site request forgery (CSRF) attacks.It can be used as a unique identifier on your side to track this specific integration onboarding operation.Must be at least 8 characters long.Example: e5f9cdc78f39d99e |
venue_name | Optional | The name of the venue the merchant is integrating in your system, used to help the merchant select the correct venue on Wolt.Example: Bob's Burger |
venue_address | Optional | The address of the venue in your system, used to help the merchant select the correct venue on Wolt.Example: Locomotive Road 12 |
Handle the redirect to your portal after completing integration on Wolt
When starting the integration onboarding, you construct a URL that includes the redirect URL and state parameters. After the merchant completes the integration on Wolt, they will be redirected to the redirect URL with the authorization code and state appended as a query parameters.
The authorization code is used to get access and refresh tokens. It is single-use and valid for 1 hour. If the code is not used before it expires, the integration has to be done again. You must contact Wolt first to reset the already integrated venue before it becomes available for re-integration.
Upon receiving the redirect back to your portal, your system must:
Verify that the opaque value provided in the state parameter of the initial URL matches the value returned in the redirect URL. This helps step helps protect against cross-site request forgery (CSRF).
Extract the authorization code from the code parameter and exchange it for access and refresh tokens.
Obtain the Wolt venue ID from the access token
Here’s an example of the URL the merchant will be redirected to after completing the integration onboarding:
https://www.partner-site.com/callback?code=ory_ac_3Xht4Qcqo4MF6tKrxRu7Fd4zYYIZ6CmploWAysX9Tpo&state=e5f9cdc78f39d99e&scope=offline2
Query parameters
| Parameter name | Description |
|---|---|
code | The authorization code to exchange for access and refresh tokens.Example: ory_ac_3Xht4Qcqo4MF6tKrxRu7Fd4zYYIZ6CmploWAysX9Tpo |
state | The opaque value you provided in the initial URL to start the integration onboarding.Example: e5f9cdc78f39d99e |
scope | The scope of the access token. The offline scope indicates that the token can be used to get new access and refresh tokens.Example: offline |
Exchange refresh token for a new access token
Token exchange flowis covered in the Authentication overview section
Ensure the refresh token stays active
Token refresh flow and requirements covered in the Authentication overview section
Redo Self-Service Integration Onboarding
You should allow merchants to redo Self-Service Integration Onboarding directly from your portal. There are two general cases where redo can be helpful:
Redo onboarding with the same Wolt venue In situations where the initial onboarding encounters issues, this redo option helps to streamline recovery and ensure smooth integration reattempts. In such cases, the Wolt venue remains the same and the main goal is to generate a new authorization code and/or re-trigger the follow-up steps in your system to finalize the onboarding.
Redo onboarding with a different Wolt venue If the merchant selected the wrong Wolt venue in the original onboarding process, they should be able to redo the onboarding and pick a new Wolt venue. In this case, your system should detect that the new access token has a different Wolt venue ID in the JWT claims. This should trigger any actions needed to unlink the old Wolt venue in your system as well as link the new Wolt venue.
To support the redo process, the following guidelines should be followed:
You should always allow merchants to redo the onboarding (either by default or on demand). When they redo the onboarding, you should always get the new tokens and check the Wolt venue ID in the JWT claims.
If the venue ID is different, you should unlink the old Wolt venue and link the new Wolt venue in your system (and potentially other follow-up actions related to the venue change).
If the venue ID is the same, you can still keep the original tokens if they are still valid and operational for the venue (and ignore the tokens received from the redo process).
Merchants should receive a clear, informative message indicating the outcome of the redo process. The message should specify whether the tokens and venue ID were kept the same or overwritten.